Vanilla Sweet Cream Cold Foam: Velvety Copycat
- Time:5 minutes active + 0 minutes chilling = Total 5 minutes
- Flavor/Texture Hook: Velvety, cloud like sweetness
- Perfect for: Iced morning fuel, budget-friendly treats, beginner home baristas
The high pitched whir of a handheld frother is basically my morning alarm clock. There is something so satisfying about watching a thin liquid transform into a thick, billowing cloud in under a minute.
I remember the first time I tried to mimic that starbucks vanilla sweet cream cold foam at home, I used a whisk and a bowl. It was a disaster. I spent ten minutes shaking my arm like a madman and ended up with slightly bubbly milk that vanished the second it hit my cold brew.
But then I realized the secret isn't about the effort, it's about the tools and the temperature. Once I switched to a narrow glass and a cheap battery powered frother, everything clicked. Now, it's the quickest way to fuel up my morning without spending seven dollars on a drink that's mostly ice.
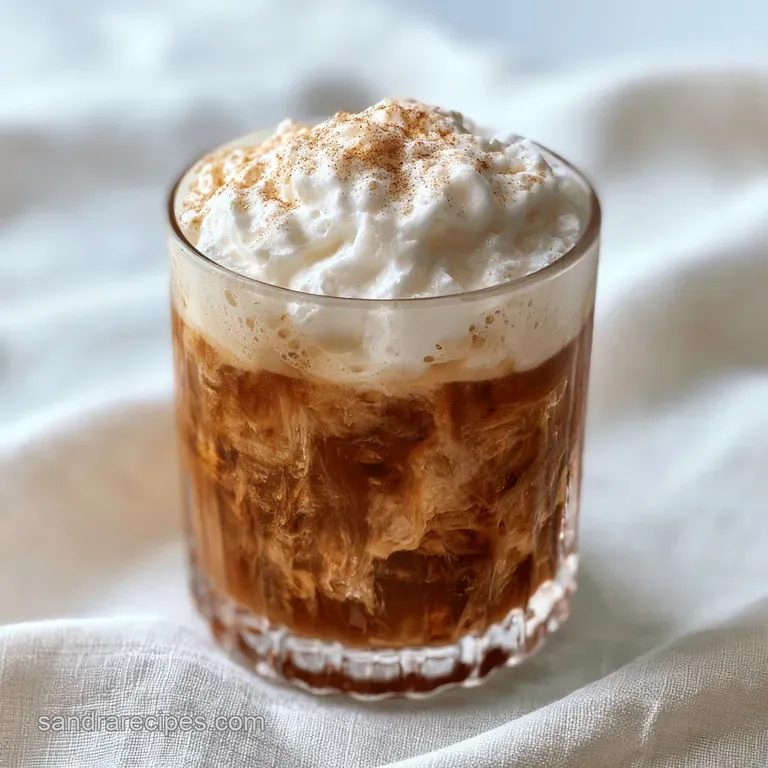
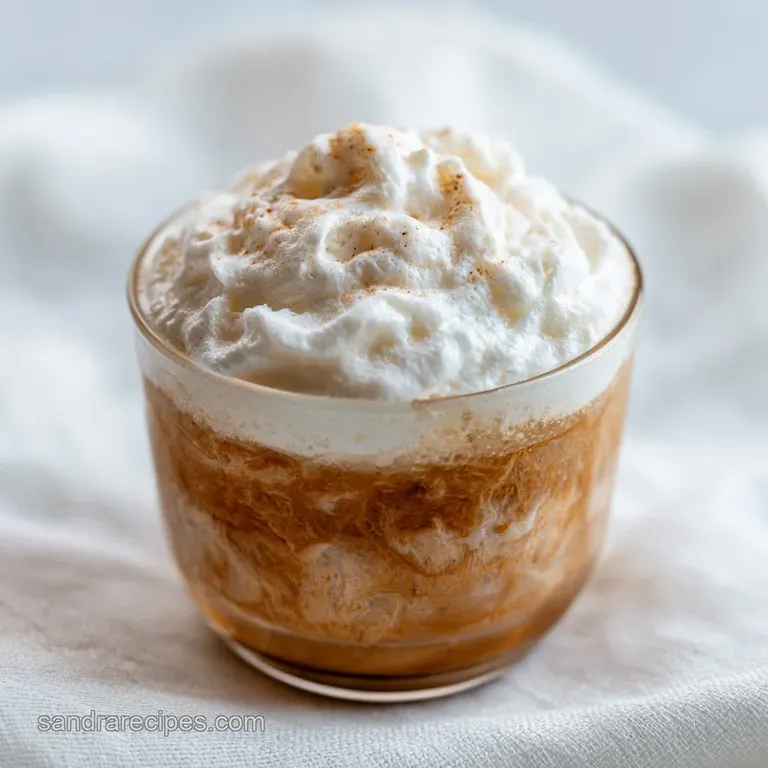
You can expect a lush, pourable topping that feels like a treat but takes almost no effort. This Vanilla Sweet Cream Foam isn't a heavy whipped cream, but it's not just frothed milk either. It's that sweet spot in the middle where the texture is silky and the taste is a gentle vanilla hug for your caffeine.
Common Recipe Failures
Most people make the mistake of using only milk or only heavy cream. If you use just milk, the air bubbles are too large and they pop instantly. If you use only cream, it becomes too thick, almost like a frosting, and won't pour naturally over your drink. The balance of the two is what creates that specific stability.
Another big issue is the temperature. If your ingredients are room temperature, the fat molecules won't hold the air bubbles as well. For a stable foam, everything needs to be ice cold. I've seen people try to warm the milk first, which is great for a latte, but for a cold foam, it's a total deal breaker.
- Fat Stability
- The heavy cream provides the structural lipids that trap air, preventing the foam from disappearing.
- Protein Binding
- The proteins in the 2% milk act as a stabilizer, keeping the bubbles uniform.
- Viscosity Control
- The sugar in the vanilla syrup increases the thickness of the liquid, which slows down the drainage of the bubbles.
- Temperature Lock
- Cold fats are more rigid, which helps the air bubbles stay trapped for longer.
| Method | Time | Texture | Best For |
|---|---|---|---|
| Handheld Frother | 1 minute | Velvety & Bubbly | Single servings, speed |
| French Press | 3 minutes | Dense & Micro foam | Larger batches, rich texture |
| Electric Whisk | 2 minutes | Airy & Light | Topping desserts |
Ingredient Component Analysis
| Ingredient | Science Role | Pro Secret |
|---|---|---|
| Heavy Cream | Structural Fat | Use a brand with at least 36% fat for maximum loft |
| 2% Milk | Protein Balance | Avoid skim milk; it lacks the fat needed to hold air |
| Vanilla Syrup | Sweetener/Stabilizer | Cold syrup incorporates faster than granulated sugar |
The Budget Shopping List
You don't need a professional barista kit for this. I usually grab the store brand heavy cream and milk to keep costs down. The vanilla syrup is the only place where I'm a bit pickier, but even a budget version works if it's a liquid syrup and not a powder.
- 2 tbsp heavy cream Why this? Provides the essential fat for foam stability. Substitute: Half and half (result will be thinner).
- 2 tbsp 2% milk Why this? Thins the cream so it's pourable. Substitute: Whole milk (result will be richer).
- 1 tbsp vanilla syrup Why this? Adds sweetness and a bit of viscosity. Substitute: Maple syrup + drop of vanilla extract.
Essential Kitchen Tools
The tool choice is where most people go wrong. You don't need a $100 machine, but you do need a few specific items to get the texture right.
First, get a narrow glass. If you use a wide bowl, the frother whisk just pushes the liquid around instead of pulling air into it. A tall, slim glass or a measuring cup is best. Second, a handheld milk frother is your best friend here. They are usually under ten dollars and do 90% of the work.
Chef: If you don't have a frother, a clean French press works brilliantly. Just pump the plunger up and down rapidly for about 30 seconds. It creates a very dense, professional style micro foam.
The step-by-step Process
Right then, let's get into it. This is a fast process, so have your coffee ready before you start frothing.
- Pour the heavy cream, 2% milk, and vanilla syrup into a narrow glass. Note: Ensure everything is chilled to keep the foam stable.
- Position the handheld frother at a slight angle just below the surface of the liquid.
- Activate the frother and move it in a slow, circular motion.
- Continue frothing until the liquid doubles in volume and looks thick and bubbly.
- Stop immediately once you see a velvety peak form to avoid over mixing.
- Tilt your iced coffee glass slightly.
- Slowly pour the cream cold foam over the top.
- Watch it cascade down the sides of the glass for that layered look.
Common Problem Solutions
If your foam isn't behaving, it's usually a matter of physics. According to Serious Eats, the stability of a foam depends on the surface tension of the liquid and the presence of fats. If your foam is too thin, you're likely missing that fat to protein balance.
Why Your Foam Collapses
This usually happens because the milk was too warm or you used a low-fat substitute. The bubbles simply can't hold their shape without enough chilled fat.
Why Liquid Separates
If you over froth, you're essentially starting to make whipped cream. The fat clumps together and pushes the liquid out, leaving you with a curdled mess.
| Problem | Root Cause | Solution |
|---|---|---|
| Foam is too thin | Not enough heavy cream | Add 1 extra tsp of heavy cream |
| Foam is too thick | Too much heavy cream | Stir in a splash of 2% milk |
| Bubbles are too large | Frother held too high | Submerge the whisk slightly deeper |
Checklist for Success:
- ✓ All ingredients are cold from the fridge.
- ✓ Using a narrow glass for maximum aeration.
- ✓ Frother held at a 45 degree angle.
- ✓ Stopped as soon as volume doubled.
Creative Flavor Twists
Once you've got the basic vanilla sweet cream cold foam down, you can start playing with the flavors. I love adding a pinch of cinnamon or a drop of almond extract for a nuttier vibe.
If you're feeling fancy, try adding a teaspoon of cocoa powder for a mocha foam. This pairs beautifully with a cold brew. If you want something truly indulgent, you can top the foam with some fluffy marshmallows for a dessert style coffee.
For something a bit different, try adding a swirl of caramel sauce to the bottom of your glass before pouring the coffee. The combination of the salty caramel and the sweet cream is reminiscent of a creamy Tiramisu, but in a drinkable form.
Storage and Waste Guidelines
Since this is a small batch recipe, you usually use it all at once. However, if you're making a larger batch of the liquid base (before frothing), you can keep it in a sealed jar in the fridge for up to 3 days. Just give it a good shake before you froth it.
To avoid waste, remember that the leftover "foam residue" in your glass is perfect for stirring into a bowl of oatmeal or topping a smoothie. If you have leftover heavy cream that's nearing its expiration, you can freeze it in ice cube trays and pop one into a blender for a frozen coffee drink.
The Best Serving Ideas
This recipe is incredibly versatile. While it's designed for iced coffee, it works on almost anything cold.
- Cold Brew: The classic choice. The bitterness of the coffee cuts through the sweetness of the foam.
- Iced Matcha: The earthy green tea flavor is balanced by the vanilla cream.
- Iced Chai: Creates a spicy, creamy treat that feels like a hug in a glass.
- Frozen Hot Chocolate: Pour it over a blended chocolate drink for a decadent dessert.
Decision Shortcut: Want it thicker? Use more heavy cream. Want it lighter? Increase the milk ratio. Want it sweeter? Add an extra teaspoon of syrup.
- 1. Volume
- The liquid must exactly double in size before you stop.
- 2. Temperature
- Ingredients must be below 4°C (40°F).
- 3. Time
- Frothing should take between 30 and 45 seconds.
Recipe FAQs
What ingredients does Starbucks use for vanilla sweet cream cold foam?
Heavy cream, 2% milk, and vanilla syrup. These three ingredients combine to create that signature rich and sweet texture.
What is the difference between vanilla cold foam and vanilla sweet cream foam?
Vanilla sweet cream foam is richer. While standard cold foam is often just frothed milk, this version includes heavy cream for a denser, more velvety mouthfeel.
Can diabetics drink coffee with this vanilla sweet cream foam?
No, it is generally not recommended. The vanilla syrup contains concentrated sugar that can cause blood glucose spikes.
What does vanilla sweet cream cold foam taste like?
Like a liquid vanilla cupcake. It is very creamy and sweet; it pairs perfectly with a warm microwave mug cake for a decadent treat.
How to make the foam thick and bubbly?
Insert the frother at a slight angle just below the surface. Move the device in a slow, circular motion until the volume doubles.
Can I store the liquid base in the fridge?
Yes, for up to 3 days. Keep the mixture in a sealed jar and give it a good shake before frothing.
Is it true that the ingredients must be room temperature to froth correctly?
No, this is a common misconception. The liquids must be well chilled to ensure the foam stabilizes and holds its structure.
Vanilla Sweet Cream Foam

