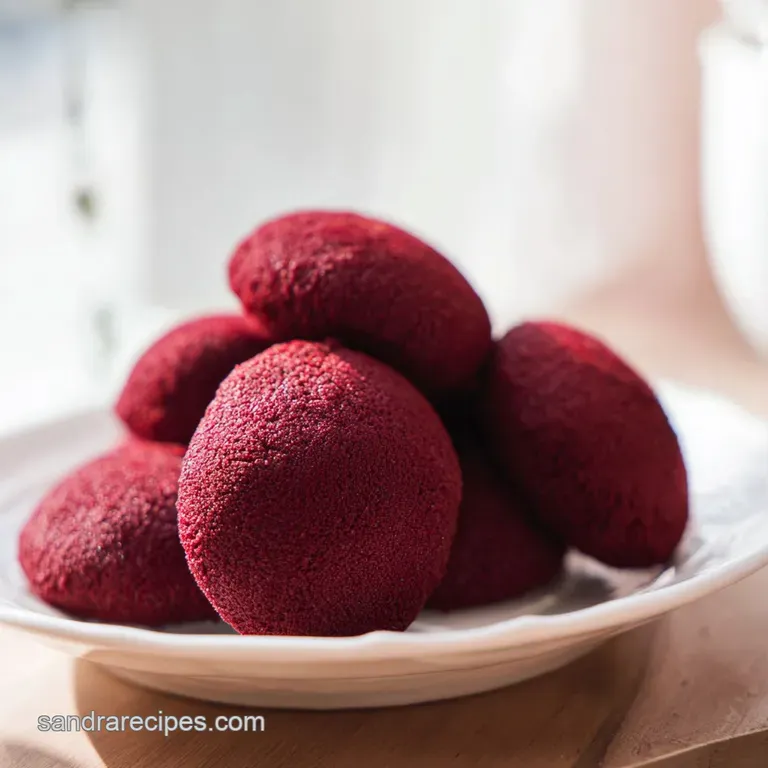
Edible Red Velvet Cookie Dough: 15-Minute Treat
- Time: 10 min active + 5 min heat treating = Total 15 minutes
- Flavor/Texture Hook: Tangy cocoa notes with a silky, fudge like consistency
- Perfect for: Late night cravings, party dessert dips, or a mood boosting snack
Edible Red Velvet Cookie Dough
I remember this one rainy Tuesday about two years ago when I was absolutely craving something sweet, but I had zero patience for the oven. I had a jar of red food coloring and some cocoa powder sitting in the pantry, and I just wanted that specific, tangy red velvet vibe without the hour long wait for cookies to cool.
I ended up improvising a raw version, and the first bite was like a velvet hug for my brain.
The smell of the cocoa powder hitting the butter is what gets me every time, a deep, earthy aroma that fills the kitchen instantly. There is something so satisfying about watching the pale butter turn a vibrant, shocking crimson as the gel coloring swirls in.
It's not just about the taste, it's that tactile joy of mixing a thick, glossy dough that you can actually eat right out of the bowl.
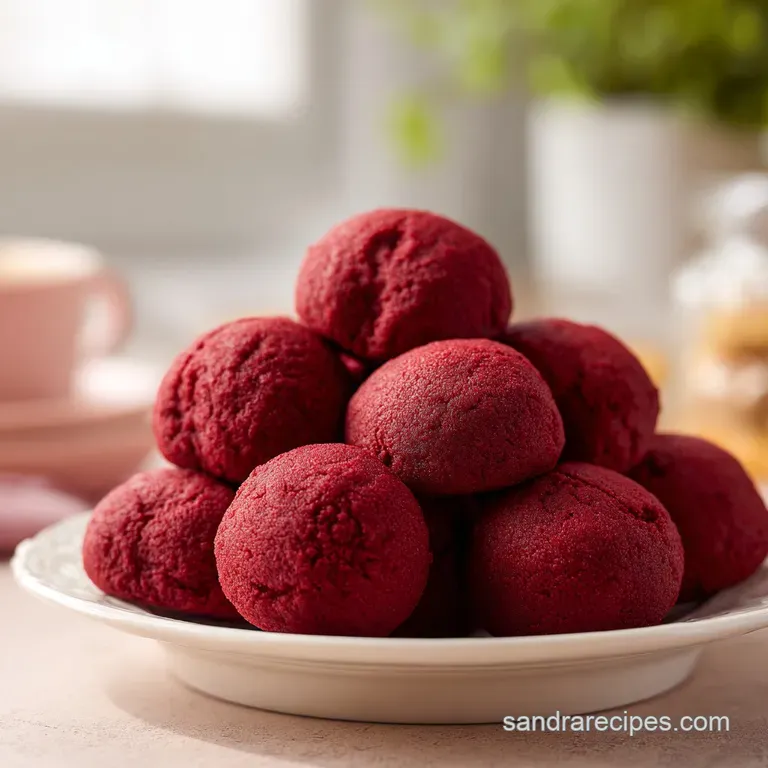
You can expect a treat that is dense, rich, and just a little bit tangy. This edible red velvet cookie dough isn't trying to be a baked cookie, it's its own thing, a decadent fudge like experience.
Whether you're sharing it with friends or hiding it in the fridge for a midnight snack, it's an irresistible little luxury.
Why These Steps Matter
Flour Heat Treatment: Raw flour can carry bacteria, so we microwave it to 160°F (71°C) to make it safe to eat. According to King Arthur Baking, this process neutralizes risks without changing the flavor too much.
Powdered Sugar Choice: Granulated sugar stays gritty in raw dough, but powdered sugar dissolves instantly. This is what gives the dough that silky, velvety texture instead of a sandy one.
Gel vs Liquid Color: Gel coloring is highly concentrated, meaning you get a deep red without adding extra liquid. This keeps the dough thick and prevents it from becoming a runny batter.
Butter Temperature: Softened butter creates a stable emulsion with the sugar. If it's too cold, you get lumps, and if it's melted, the dough loses its structure and becomes oily.
| Fresh Homemade | store-bought Edible | Impact | Best For |
|---|---|---|---|
| Full control over sugar | High preservative count | Healthier/Tastier | Home treat |
| Vibrant red color | Often pale or neon | Visual appeal | Parties |
| Fresh butter taste | Artificial flavorings | Richer profile | Gourmet craving |
The Essential Ingredients
For this recipe, we're focusing on a balance of fats and sugars to get that classic red velvet profile. Don't skip the salt, as it cuts through the richness of the white chocolate.
- 115g unsalted butter, softened Why this? Provides the creamy, rich base
- 180g powdered sugar, sifted Why this? Ensures a smooth, non gritty texture
- 125g all purpose flour Why this? Gives the dough its body
- 15g unsweetened cocoa powder Why this? Adds the signature chocolate depth
- 5ml vanilla extract Why this? Rounds out the sweetness
- 1.5g salt Why this? Balances the sugar
- 15-30ml milk (only if needed for texture) Why this? Adjusts consistency
- 5ml red gel food coloring Why this? Creates the iconic color
- 85g mini white chocolate chips Why this? Adds creamy, sweet pops
| Original Ingredient | Substitute | Why It Works |
|---|---|---|
| Unsalted Butter | Coconut Oil (solid) | Similar fat content. Note: Adds a slight coconut flavor |
| Powdered Sugar | Finely blended cane sugar | Similar sweetness. Note: Texture will be slightly grainier |
| White Chocolate Chips | Mini Dark Chocolate Chips | Still adds texture. Note: Makes the flavor more intense and less sweet |
| Milk | Almond Milk (unsweetened) | Provides necessary moisture. Note: Virtually no taste difference |
Tools for the Job
You don't need a professional kitchen for this, just a few basic staples. I usually use a hand mixer, but you can totally do this with a sturdy whisk and some elbow grease if you're feeling athletic.
First, you'll need a microwave safe bowl for the flour and an instant read thermometer. This is the only "techy" part, but it's non negotiable for safety. If you don't have a thermometer, you can toast the flour in a pan, but the microwave is just faster.
For the mixing, a medium bowl and a hand mixer (like a KitchenAid or a simple handheld one) work best. A fine mesh sifter is also key, especially for the powdered sugar and cocoa, because cocoa powder loves to clump into little bitter bombs.
Step-by-step Process
Let's get into it. This is where the magic happens, and the smells start to get really inviting.
- Place the flour in a microwave safe bowl. Heat in 30 second bursts, stirring in between, until the flour reaches 160°F (71°C) on an instant read thermometer. Note: Stirring prevents hot spots from burning the flour
- Let the heat treated flour cool completely. until it feels room temperature to the touch.
- In your mixing bowl, beat the softened butter and powdered sugar together using a hand mixer until pale and fluffy (about 2 minutes).
- Stir in the vanilla extract and red gel food coloring until uniform. until the mixture is a consistent, bright red.
- Sift in the heat treated flour, cocoa powder, and salt. Note: Sifting prevents lumps of cocoa in your dough
- Mix on low speed until just combined. until no white streaks of flour remain.
- If the dough feels too stiff, stir in milk one tablespoon at a time. Note: Stop as soon as it's scoopable
- Fold in the white chocolate chips. until evenly distributed throughout the red mass.
Chef's Note: If you want an even deeper color, let the dough sit in the fridge for 30 minutes. The color often intensifies as it rests, and the flavor melds together.
Troubleshooting Common Issues
Sometimes things go sideways, and that's okay. I've had batches that looked more like pink porridge than dough, so don't panic.
| Issue | Solution |
|---|---|
| Why Your Dough Is Grainy | This usually happens if the powdered sugar wasn't sifted or if you used granulated sugar. The crystals don't dissolve in butter like they do in a baked cookie. To fix this, you can't really "un grain" |
| Why Your Dough Is Too Runny | Too much milk or butter that was too soft (almost melted) is the usual culprit. If it's too soft, just pop the whole bowl in the fridge for 20 minutes. It'll firm up and become scoopable again. |
| Why Your Dough Looks Pink | This happens when using liquid food coloring instead of gel, or not using enough. Liquid colors dilute the dough and often result in a pastel shade. You can add more gel color, but do it in tiny drops |
Common Mistakes Checklist
- ✓ Did you heat the flour to exactly 160°F?
- ✓ Did you let the flour cool before adding it to the butter?
- ✓ Did you sift the cocoa powder to avoid bitter clumps?
- ✓ Did you use gel coloring instead of liquid drops?
- ✓ Did you stop mixing as soon as the flour disappeared?
Tasty Flavor Variations
Once you've got the base down, you can really have some fun with this. I love experimenting with mix ins to change the vibe of the homemade edible red velvet cookie dough.
If you're feeling fancy, try the Cheesecake Twist. Fold in small chunks of chilled, firm cream cheese and a pinch of lemon zest. It turns the dough into a red velvet cheesecake experience. For something more intense, try the "Double Cocoa" version by adding 10g of dark chocolate shavings along with the white chips.
If you only need a tiny bit for yourself, you can easily make an edible red velvet cookie dough for one by halving the ingredients and using a small ramekin. It's a great way to satisfy a craving without having a giant bowl of dough in the fridge. For another chocolatey treat, my classic chocolate chip cookies are always a hit, but these red velvet bites are for when you just can't wait for the oven.
Decision Shortcut:
- If you want it fudgier → Add an extra 10g of butter.
- If you want it tangier → Add 1/4 teaspoon of cream of tartar.
- If you want it crunchier → Swap white chocolate for chopped pecans.
Storage and Zero Waste
You don't have to eat this all in one sitting, though I've certainly tried. Because there are no eggs, it lasts quite a while in the fridge.
Store the dough in an airtight container or a zip top bag. It'll stay fresh and velvety in the refrigerator for up to 5 days. If you're planning to keep it longer, you can freeze it for up to 2 months. Just thaw it in the fridge overnight before eating.
To avoid waste, if you have a tiny bit of dough left that isn't enough for a serving, roll it into a small ball and freeze it. These "dough drops" are great for topping a bowl of vanilla ice cream. Also, if you have leftover red food coloring, it's great for frosting or making red pancakes for a special breakfast.
Best Ways to Serve
This is where you can turn a simple snack into a party centerpiece. I love serving the edible red velvet cookie dough in a chilled bowl with a small spoon, almost like a dip.
For a crowd, scoop the dough into small, bite sized balls and place them in mini cupcake liners. It makes them look like little truffles and keeps your fingers clean. You can even dust the top with a bit of extra cocoa powder for a professional look.
Another fun way is to use it as a filling. Slather it between two graham crackers or use it as a dip for sliced apples. The tartness of the apple cuts through the richness of the red velvet perfectly. Trust me, once you try it as a dip, you'll never go back to just eating it from the bowl.
Final Pro Tips:
- Freeze your butter for 10 minutes before softening if it's too melty.
- Add a tiny pinch of espresso powder to deepen the cocoa flavor.
- Use a small cookie scoop for perfectly uniform red velvet cookie dough bites.
Recipe FAQs
Is it safe to eat raw flour?
No, raw flour can contain bacteria. Heat it to 160°F (71°C) in the microwave to make it safe for edible dough.
Why is my cookie dough grainy?
The powdered sugar likely wasn't sifted. Since the dough isn't baked, sugar crystals won't dissolve in the butter.
How to fix dough that is too stiff?
Stir in milk one tablespoon at a time. Mix slowly until you reach your desired velvety consistency.
How long can I store the dough in the refrigerator?
Keep it for up to 5 days. Store it in an airtight container or zip-top bag to maintain freshness.
Is it true that liquid food coloring works best for the red hue?
No, this is a common misconception. Red gel food coloring provides a more intense color without thinning the dough.
How to heat treat the flour properly?
Heat flour in 30-second bursts in a microwave safe bowl, stirring between intervals until it reaches 160°F (71°C).
Can I add other mix-ins like M&Ms or Oreos?
Yes, those additions work great. If you enjoyed mixing textures here, see how we handle different toppings in our Valentine's Day cookies.
Edible Red Velvet Cookie Dough