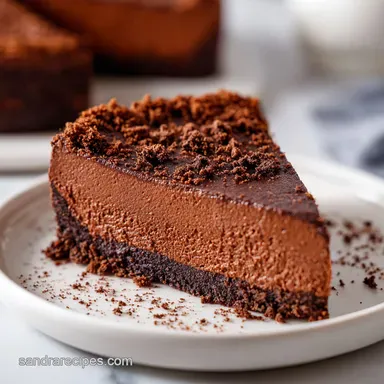
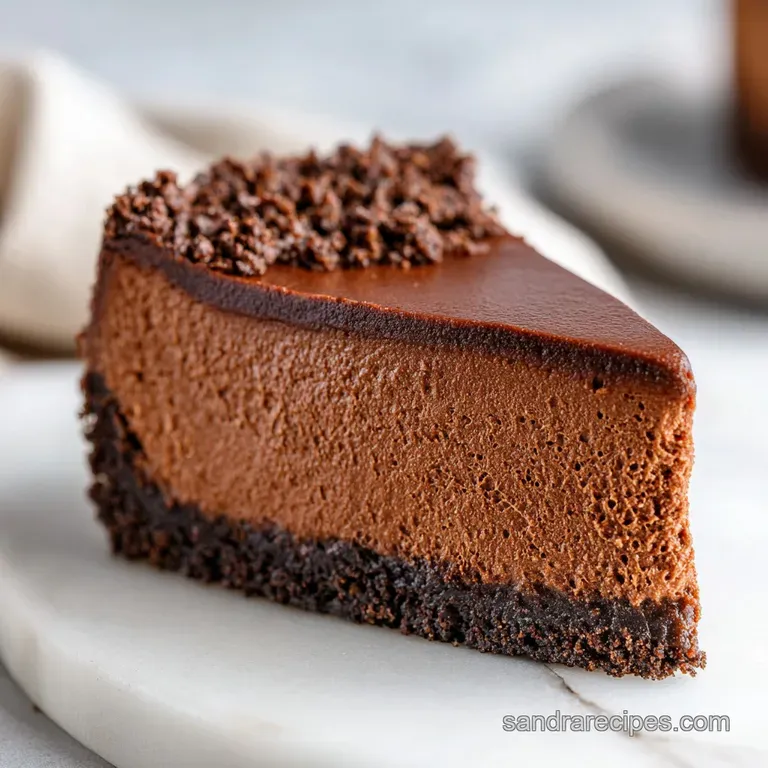
Easy No Bake Chocolate Cheesecake: Rich and Velvety
- Time:30 minutes active + 6 hours chilling = Total 6 hours 30 mins
- Flavor/Texture Hook: Velvety chocolate filling with a shattering wafer crust
- Perfect for: Last minute dinner parties, summer celebrations, or beginner bakers
Easy no bake chocolate cheesecake
The scent of melted butter and dark cocoa always takes me back to those chaotic family potlucks in the 90s. Back then, the "no bake" dessert was a cultural staple, a way to bypass the humid summer heat of a kitchen stove while still bringing something that looked impressive.
These cakes weren't about fancy technique, they were about the communal joy of a chilled, creamy treat that felt like a cheat code for dessert.
I remember the first time I tried to make one for a birthday. I didn't realize the cream cheese had to be truly soft, so I ended up with these little white lumps that looked like tiny clouds in a chocolate storm.
It wasn't a disaster, but it taught me that temperature is everything when you aren't using heat to bind things together.
Now, this easy no bake chocolate cheesecake is my go to because it balances that nostalgic, airy feel with a deep, velvety chocolate punch. It's not just a simple mix, it's about layering textures, from the crunch of the base to the silky finish on top.
Trust me, once you see how easy it is to get that professional look without the stress of a cracked top, you'll never go back to the oven version.
Why It Actually Sets
Since we aren't using eggs or heat to coagulate the proteins, we have to rely on a few other tricks to make sure the cake doesn't turn into a puddle the moment it hits the plate. It's all about the fat and the air.
- Fat Solidification
- The mixture of full fat cream cheese and melted chocolate hardens as it cools in the fridge, creating a stable wall.
- Air Suspension
- Whipping the heavy cream introduces tiny bubbles that get trapped in the fat, giving it a light, mousse like lift.
- Sugar Binding
- Powdered sugar contains a bit of cornstarch, which helps thicken the filling more than granulated sugar would.
- Cold Fusion
- By freezing the crust and chilling the bowl, we lock in the structure before the filling has a chance to soften.
If you've ever tried making something like Christmas fudge, you know that temperature control is the only thing standing between a velvety treat and a grainy mess.
| Feature | Fast No Bake | Classic Baked |
|---|---|---|
| Texture | Light and mousse like | Dense and creamy |
| Prep Time | 30 minutes | 60+ minutes |
| Risk Factor | Very low (no cracking) | High (water bath needed) |
| Setting Method | Refrigeration | Heat coagulation |
Component Analysis
Understanding what each part does helps you avoid those common mistakes I used to make. You aren't just mixing things, you're building a structure.
| Ingredient | Science Role | Pro Secret |
|---|---|---|
| Full Fat Cream Cheese | Primary structural base | Must be room temp to avoid lumps |
| Heavy Whipping Cream | Aeration and lift | Use a chilled bowl for maximum volume |
| Melted Chocolate | Flavor and stability | Cool it slightly so it doesn't melt the cream |
| Chocolate Wafers | Textural contrast | Add a pinch of sugar to the crust for "snap" |
Shopping List Breakdown
When you're at the store, don't be tempted by the "light" or "low-fat" versions of these ingredients. In a no bake recipe, fat is your only friend. If you use low-fat cream cheese, the cake will likely be too soft to slice, and you'll end up with a chocolate soup.
- 1.5 cups (150g) chocolate wafer crumbs Why this? Provides a deep cocoa base and a distinct crunch
- 5 tbsp (70g) unsalted butter, melted Why this? Binds the crumbs into a solid, sliceable crust
- 1 tbsp (12g) granulated sugar Why this? Adds a slight crystalline snap to the base
- 16 oz (450g) full fat cream cheese, softened Why this? The essential fat source for the structure
- 1 cup (120g) powdered sugar Why this? Dissolves instantly and provides subtle thickening
- 0.5 cup (45g) unsweetened cocoa powder Why this? Intense chocolate flavor without adding extra liquid
- 1 cup (240ml) heavy whipping cream, chilled Why this? Creates the velvety, airy volume
- 1 tsp (5ml) vanilla extract Why this? Rounds out the bitterness of the cocoa
- 4 oz (115g) semi sweet chocolate, melted Why this? Sets firmly in the fridge for a clean slice
- 0.5 cup (120ml) heavy whipping cream, whipped Why this? A light, fluffy topping to contrast the rich base
- 2 tbsp (30g) chocolate shavings Why this? Visual appeal and a different chocolate texture
| Original Ingredient | Substitute | Why It Works |
|---|---|---|
| Chocolate Wafers | Oreo Crumbs (filling removed) | Similar crunch. Note: Sweeter and darker than wafers |
| Semi Sweet Chocolate | Dark Chocolate (60% cocoa) | Sets even firmer. Note: More bitter, less sweet |
| Heavy Whipping Cream | Mascarpone (whipped) | Even richer texture. Note: Much denser than cream |
| Powdered Sugar | Icing Sugar | Identical function. Note: Ensure it's sifted |
Right then, let's talk gear. You don't need a professional kitchen, but a few specific tools make this a breeze.
Essential Gear for Success
- 9 inch Springform Pan: This is non negotiable. You cannot flip a no bake cheesecake, so you need the sides to pop off.
- Electric Hand Mixer: While you could whisk by hand, getting the cream cheese "cloud like" requires a bit of motorized power.
- Rubber Spatula: For the folding process. If you stir too hard, you'll pop all those lovely air bubbles.
- Fine Mesh Sieve: To ensure the cocoa powder doesn't leave any bitter clumps in your filling.
- Metal Mixing Bowl: Especially for the whipping cream, as metal stays colder than plastic.
Bringing It Together

Let's crack on. The secret here is patience. Don't rush the chilling times, or you'll be eating chocolate dip instead of cake.
Phase 1: Constructing the Foundation
- Combine chocolate crumbs, melted butter, and granulated sugar in a bowl. Stir until the mixture resembles wet sand.
- Press the crust mixture firmly into the bottom and slightly up the sides of a 9 inch springform pan. Note: Use the bottom of a flat glass to get it really packed.
- Freeze for 10 minutes until the base feels solid and cold. This prevents the crust from absorbing too much moisture from the filling.
Phase 2: Crafting the Chocolate Core
- Beat the softened cream cheese and powdered sugar together using an electric mixer until smooth and cloud like. Note: Scrape the sides of the bowl often.
- Sift in the cocoa powder and add the vanilla extract, mixing on low speed until the color is a uniform deep mahogany.
- Slowly pour in the melted and slightly cooled semi sweet chocolate, folding it in with a spatula until fully incorporated. Note: If the chocolate is too hot, it will melt your cream cheese.
Phase 3: Adding the Lift and Setting
- In a separate chilled bowl, whip the 1 cup of heavy cream until stiff peaks form. Stop as soon as the peaks stand straight up to avoid over beating into butter.
- Gently fold the whipped cream into the chocolate mixture using a cut and fold technique. Note: Slice through the middle and fold over to keep the air inside.
- Pour the filling into the prepared crust and smooth the top with a spatula.
- Top with additional whipped cream and chocolate shavings.
- Refrigerate for at least 6 hours, or overnight, until the cake feels firm to a light touch.
Chef's Note: For a truly shatter crisp crust, try freezing your butter for 10 minutes before melting it, then stir in a pinch of salt. It cuts through the sweetness and makes the base feel more like a high end tart.
How to Fix Common Problems
Even with a simple recipe, things can go sideways. Usually, it's a temperature issue. If the filling feels like it's not setting, don't panic, just give it more time in the coldest part of your fridge.
The Filling is Too Soft to Slice
This usually happens if the cream cheese wasn't full fat or if the cake hasn't chilled for the full 6 hours. The fats need time to crystallize and lock together. If it's still too soft, pop it in the freezer for 30 minutes before slicing.
Lumps in the Batter
Lumps occur when cold cream cheese is mixed with other ingredients. It's almost impossible to beat them out once the cocoa is in. The only fix is to ensure the cream cheese is truly room temperature before you start.
The Crust is Crumbling
A crumbling crust means there wasn't enough butter or the crumbs weren't pressed down firmly enough. Use a heavy glass or a measuring cup to pack the crumbs into the pan until they feel like a solid piece of wood.
| Problem | Root Cause | Solution |
|---|---|---|
| Filling is grainy | Cream cheese was too cold | Let it sit at room temp for 2 hours |
| Over whipped cream | Beating too long | Fold in a bit of liquid cream to soften |
| Crust is soggy | Didn't freeze the base | Freeze crust for 10 mins before filling |
Common Mistakes Checklist:
- ✓ Did you use full fat cream cheese? (low fat will not set)
- ✓ Is the chocolate cooled before adding? (Hot chocolate ruins the texture)
- ✓ Did you fold the whipped cream instead of stirring? (Stirring removes the air)
- ✓ Did you chill for at least 6 hours? (Patience is key for the structure)
- ✓ Was the cocoa powder sifted? (Clumps are a nightmare in the filling)
Adjusting the Batch Size
Whether you're feeding a crowd or just treating yourself, this recipe is flexible. But be careful with the pan sizes, as the depth of the filling changes the setting time.
Scaling Down (Half Batch) If you're using a 6 inch pan, just halve everything. You can still use the same chilling time, though it may set slightly faster. If you need to use half an egg in a different variation, beat one egg in a cup and measure out 2 tbsp.
Scaling Up (Double Batch) For a larger party, I recommend making two separate 9 inch cakes rather than one deep one. Deep no bake cakes can sometimes sag in the middle because the weight presses down on the air bubbles.
If you double the chocolate and cocoa, keep the vanilla at 1.5x instead of 2x to keep the flavor balanced.
| Goal | Adjustment | Result |
|---|---|---|
| Mini Cups | Use cupcake liners | Faster set time (3 hours) |
| Extra Rich | Increase chocolate by 2oz | Denser, fudgier texture |
| Lighter Feel | Increase whipped cream by 0.5 cup | More mousse like, softer slice |
Flavor Twists and Diet Swaps
Once you've nailed the basic easy no bake chocolate cheesecake, you can start playing with the flavors. This is where it gets fun.
Flavor Variations
- Raspberry Swirl: Drop small dollops of raspberry jam onto the filling and swirl with a knife before chilling.
- Coffee Kick: Dissolve a teaspoon of espresso powder into the melted chocolate for a mocha version.
- Nutty Crunch: Press crushed hazelnuts into the sides of the crust for extra texture. If you love rich chocolate, you might also enjoy these football brownies for your next gathering.
Dietary Adaptations - gluten-free: Most chocolate wafers are naturally GF, but double check the label. If not, use crushed almond flour mixed with cocoa powder and sugar for the base. - Lower Sugar: Use a monk fruit powdered sweetener.
It works surprisingly well, though the texture is slightly less "silky".
Storage Guidelines
Since there are no eggs, this cake is very stable in the fridge, but it will absorb smells if left uncovered.
Fridge and Freezer Keep the cake in the springform pan or move it to a cake stand and cover it with a loose dome. It stays velvety in the fridge for up to 5 days. For the freezer, slice the cake first and wrap each slice in parchment paper and foil. It'll keep for 2 months.
Zero Waste Tips If you have leftover chocolate wafer crumbs, don't toss them! Stir them into your morning yogurt or use them as a topping for a chocolate smoothie. If you have a bit of whipped cream left over, use it to top some fresh berries for a quick snack.
Serving and Enjoying
To get those clean, sharp slices that look like they came from a bakery, you need a hot knife. Run a sharp knife under hot water for 10 seconds, wipe it dry, and then slice. Clean the knife between every single cut.
For a final touch, serve each slice with a few fresh raspberries or a drizzle of salted caramel. The tartness of the berries cuts through the richness of the chocolate, making it feel less heavy. Because this is such an easy no bake dessert, you can focus all your energy on the presentation.
Pair it with a strong cup of black coffee to balance the sweetness, and you've got a world class treat without ever turning on the oven.
Recipe FAQs
How to make a 3 ingredient no-bake cheesecake?
Beat cream cheese, powdered sugar, and whipped cream. Whip these three ingredients together until stiff and chill until set.
How do you make a 2 ingredient cheesecake?
Whip heavy cream and cream cheese together. Beat both ingredients until thick and fluffy, then refrigerate until firm.
Can I add melted chocolate to no-bake cheesecake?
Yes, it adds richness and stability. Fold slightly cooled melted semi sweet chocolate into the cream cheese mixture before adding the whipped cream.
What are common no-bake cheesecake mistakes?
Using cold cream cheese or insufficient chilling. Ensure cream cheese is softened to avoid lumps and refrigerate for at least 6 hours to ensure the cake sets.
How long does the cake stay fresh in the fridge?
Up to 5 days. Keep the cake covered with a loose dome to prevent it from absorbing odors from other refrigerated foods.
Why is my filling too soft or runny?
The heavy cream may not have reached stiff peaks before folding. If you enjoyed mastering the cut-and-fold technique here, see how the same principle works in our pumpkin cheesecake.
Is it true that no-bake cheesecakes never fully set?
No, this is a common misconception. With a full 6 hours of refrigeration and properly whipped cream, the filling becomes stable and easily sliceable.
No Bake Chocolate Cheesecake